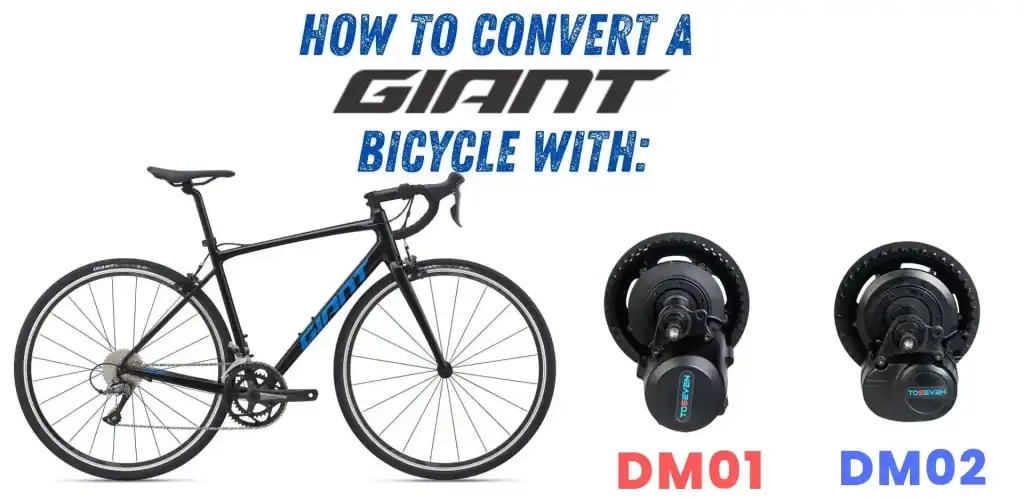
Welcome! If you are looking to transform your trusty Giant bicycle into a high-performance electric bike using a Toseven DM01 or DM02 mid-drive motor, you are in the right place. As a professional bicycle conversion engineer, I am here to walk you through this process step-by-step.
We will take this one section at a time, ensuring you understand exactly how your bike works and how the motor integrates with it. Let us start with the most important step:
Compatibility is determined strictly by the frame’s bottom bracket standard and metallurgical composition.
If you do not see your exact Giant model listed, simply identify your bottom bracket type. Giant’s engineering standards are consistent:
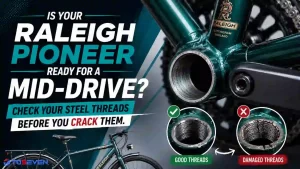
Threaded BSA shell = 🟢 Recommended.
41mm Press-Fit shell = 🟡 Compatible (Adapter provided).
Carbon fiber frame = 🟠 Extreme caution.
✅ Factory Support Notice
Customers do Not need to source hardware separately. Every Toseven motor includes a precision 1mm and 2mm Spacer Kit designed for fine-tuning motor displacement. For Press-Fit frames, these spacers must be used in conjunction with our official CNC High-Precision Reducer Support Bushings to ensure the motor is perfectly centered and the locknut applies maximum pressure to the assembly.01 Compatibility Overview
Why Giant Bikes are Excellent for E-Bike Conversions
When you add an electric mid-drive motor to a bicycle, you are introducing a massive amount of pulling force—known as torque—to the frame. The Toseven DM01, for example, generates up to 160 Newton-meters (Nm) of torque. This extreme twisting force can deform or crack weak frames, especially around the pedal area. Fortunately, Giant bicycles are structurally robust. Giant manufactures its own proprietary “ALUXX” aluminum frames, which utilize a high-strength 6061 (or a 6011, if you use the SL OR SLR models) alloy and reinforced, butted tubing. This engineering makes Giant’s mountain and hybrid frames incredibly strong and well-suited to handle the stress of a high-torque Toseven motor safely.Key Terms You Need to Know (Beginner’s Glossary)
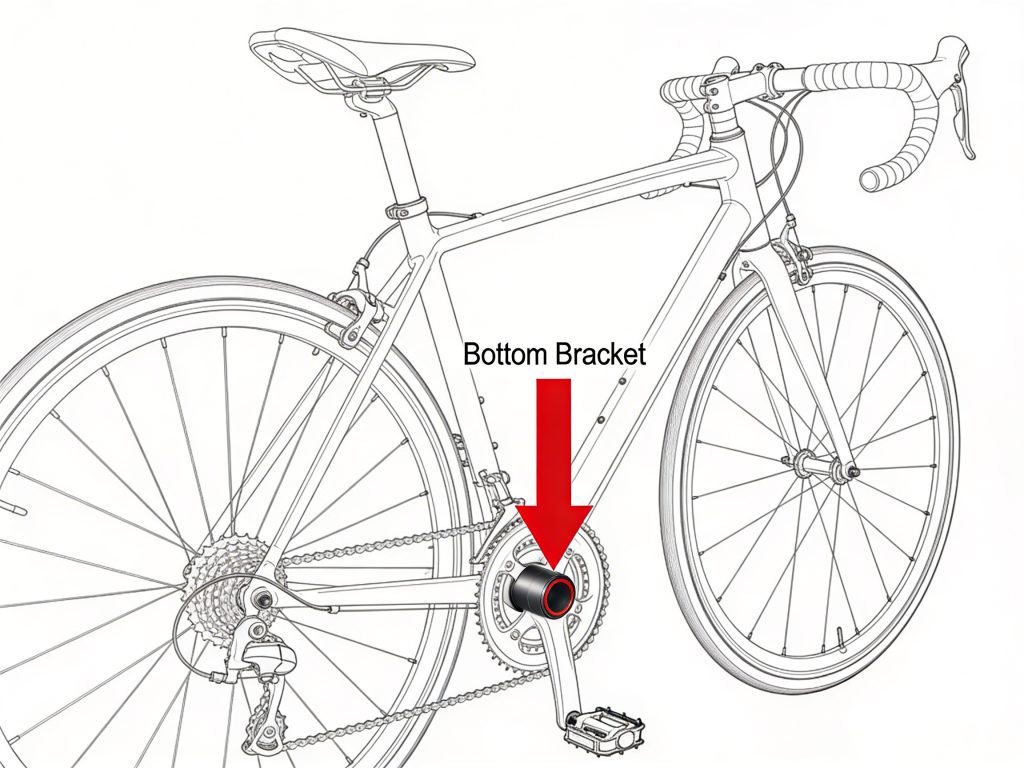
Before we look at your specific bike model, let’s explain a few mechanical terms in plain English:- Bottom Bracket (BB): This is the hollow metal tube at the very bottom of your bike frame where your pedal crank arms attach. The motor will slide directly into this tube.
- BSA (English Threaded): This is the traditional, classic standard for bottom brackets. The inside of the metal shell has screw threads, and it typically measures 68mm to 73mm wide with an inside diameter of about 34.8mm. Toseven motors are natively designed to slide perfectly into BSA threaded shells without any extra modifications.
- Press-Fit (BB86 / BB92): This standard uses a smooth 41mm inside diameter. Because the Toseven motor axle has a precision diameter of 33.5mm, a physical gap exists that requires a two-step engineering solution:
- Conversion: We use CNC High-Precision Reducer Support Bushings. These do not just “fill the gap”—they provide a high-strength interface that distributes the motor’s 160Nm of torque evenly across the entire bottom bracket wall, preventing radial displacement or “creaking” during high-intensity riding.
- Fine-Tuning: Utilize the factory-supplied 1mm and 2mm Spacers to micro-adjust the motor’s horizontal position. These spacers are the key accessory to ensuring the motor locknut can tighten fully against non-standard shell widths without bottoming out.
✅ Factory Support Notice
You do not need to search for or purchase these components separately. We (the Toseven motor factory) will provide the necessary official CNC High-Precision Reducer Support Bushings and a 1mm/2mm Precision Spacer Kit with your order to ensure a 100% precision fit for your specific Giant frame.- Boost vs. Non-Boost Spacing: This refers to the width of your rear wheel’s hub. Traditional (“Non-Boost”) rear hubs are 135mm or 142mm wide. Newer mountain bikes use “Boost” spacing, which is wider at 148mm. A wider rear wheel pushes your rear gears outward. When converting to an e-bike, knowing this helps us ensure your front motor aligns perfectly with your back gears—a concept known as “chainline”.
- Shift Sensor (Mandatory Integration): The shift sensor is a mandatory integrated component of all Toseven DM01 kits (The DM02 kit does not include a shift sensor and does not require one). The DM01 produces up to 160Nm of torque. High-torque systems require coordinated drivetrain management. The shift sensor ensures smooth, controlled gear transitions by automatically cutting motor power momentarily during gear changes. This protects derailleur alignment, cassette teeth, chain integrity, and the freehub engagement system. It is included by default in the factory kit and must always be installed and connected. Operating a high-torque mid-drive without shift detection is mechanically unsafe.
Giant Model Compatibility Breakdown
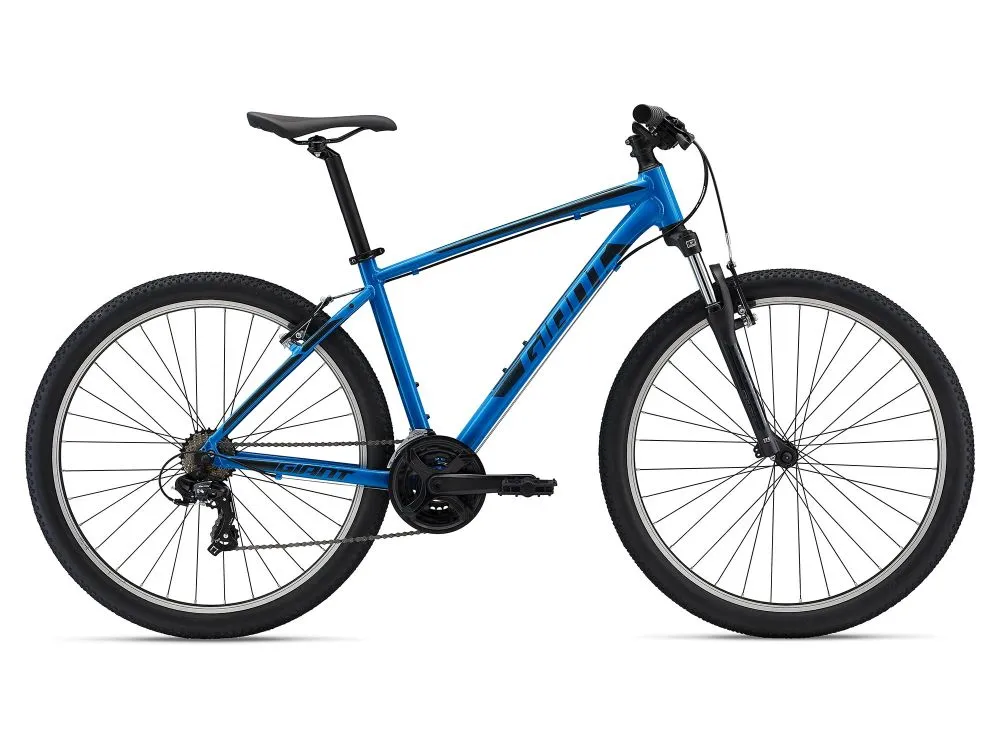
Here is exactly what you can expect when converting the most common Giant bicycle families.1Giant Talon (Mountain), Giant Escape (Fitness/City), and Giant Roam (Hybrid)
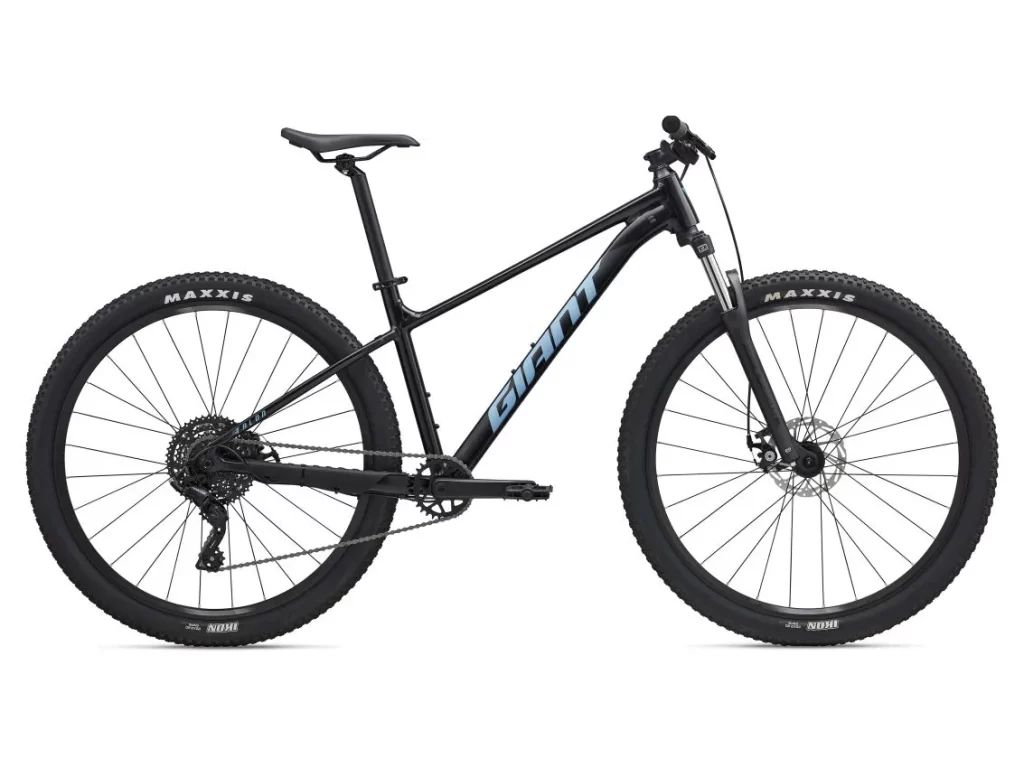
Pictured: The Giant Talon Mountain Bike.
- Bottom Bracket Type: BSA Threaded (68mm to 73mm wide).
- Adapter Required: No.
- Rear Spacing: Non-Boost (135mm or 142mm).
- Installation Difficulty: Easy.
2Giant ATX (Entry-Level MTB)
Pictured: The Giant Atx Bike.
- Bottom Bracket Type: BSA Threaded (68mm to 73mm wide).
- Adapter Required: No.
- Rear Spacing: Non-Boost (135mm).
- Installation Difficulty: Easy.
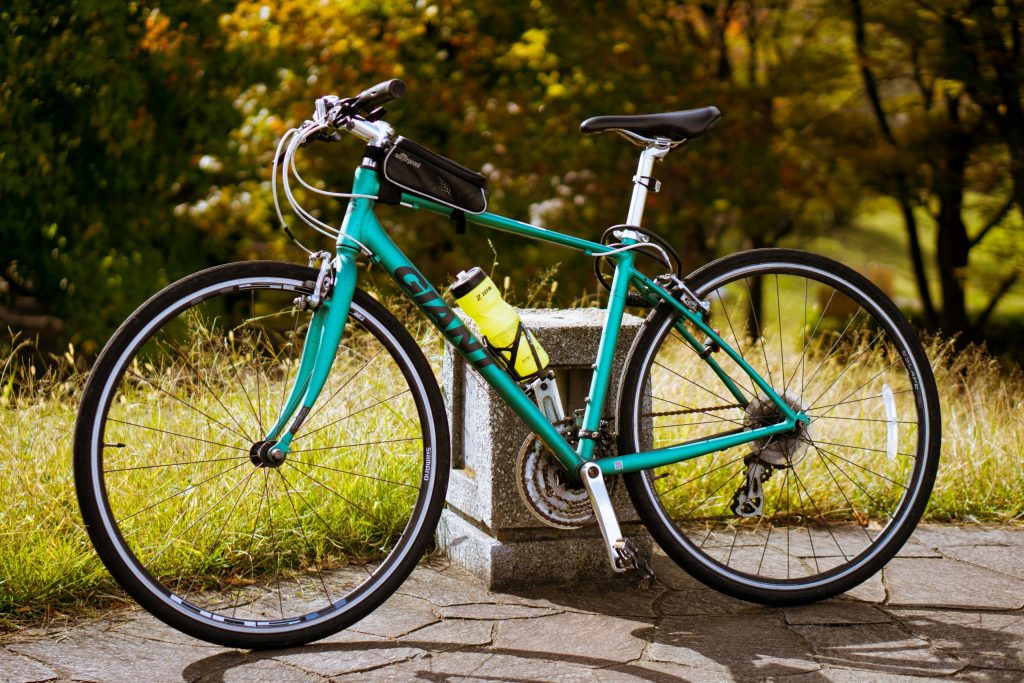
3Giant Cypress & Giant Sedona (Comfort / Lifestyle)
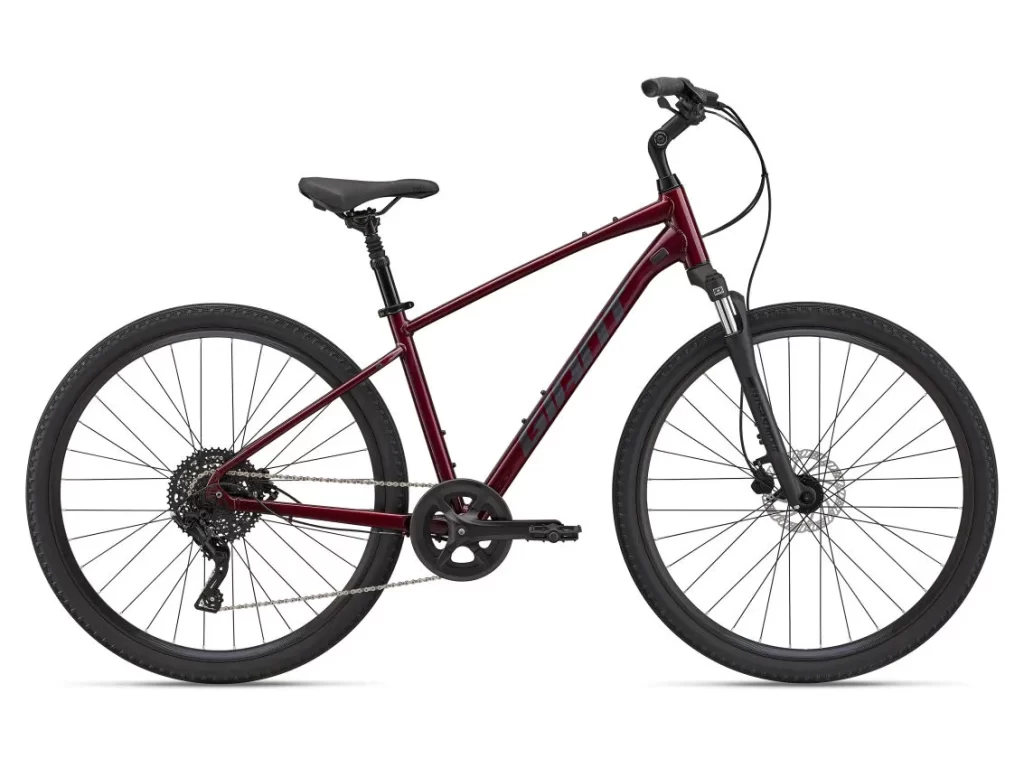
Pictured: The Giant Cypress Bike.
- Bottom Bracket Type: BSA Threaded (usually 68mm).
- Adapter Required: No.
- Rear Spacing: Non-Boost (135mm).
- Installation Difficulty: Easy.
4Giant Fathom (Progressive Mountain)
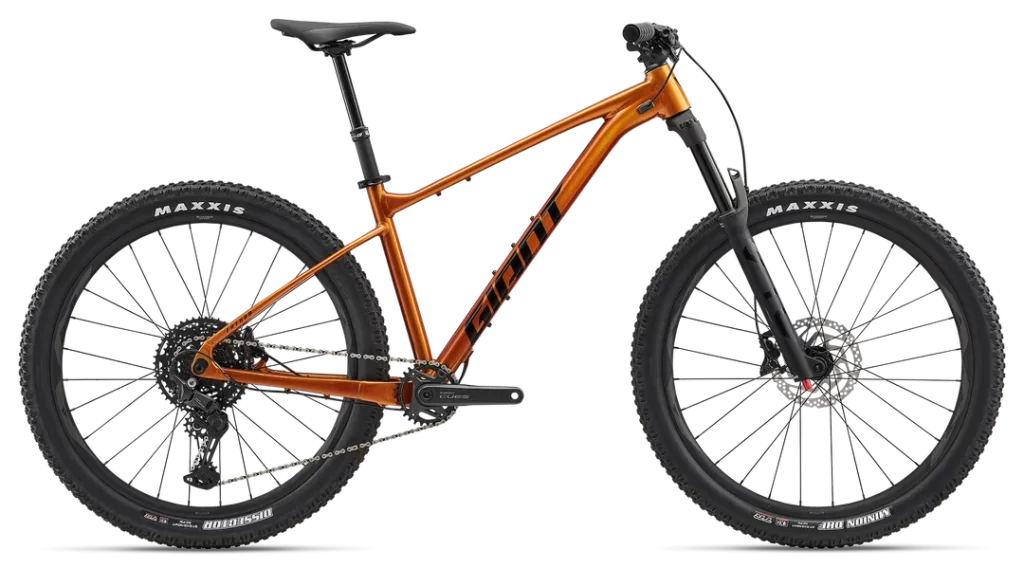
Pictured: The Giant Fathom Bike.
- Hardware Required: Yes — 100mm Axle Motor Variant Mandatory.
- Support Interface: Official Toseven CNC High-Precision Reducer Support Bushings and factory-supplied 1mm/2mm Spacers.
5Giant Revolt (Gravel)
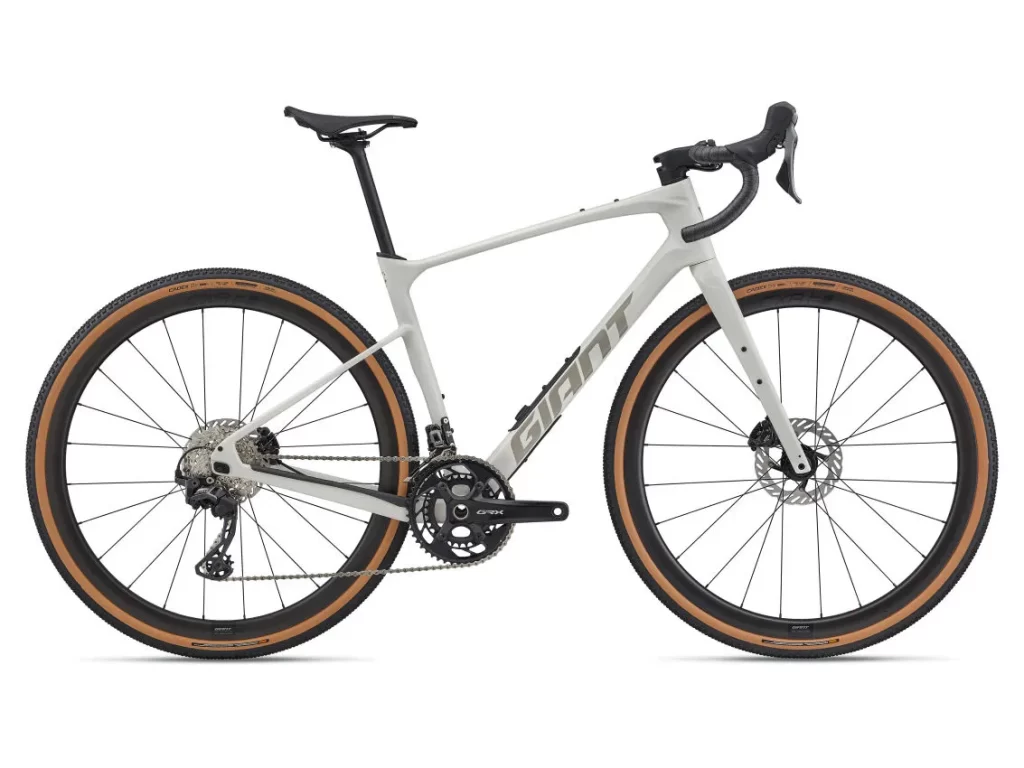
Pictured: The Giant Revolt Gravel Bike.
- Support Interface: Official Toseven CNC High-Precision Reducer Support Bushings (Carbon versions) and 1mm/2mm Spacers.
- Bottom Bracket Type: BSA Threaded 68mm.
6Giant Trance, Stance, Anthem, and Reign (Alloy Full-Suspension)
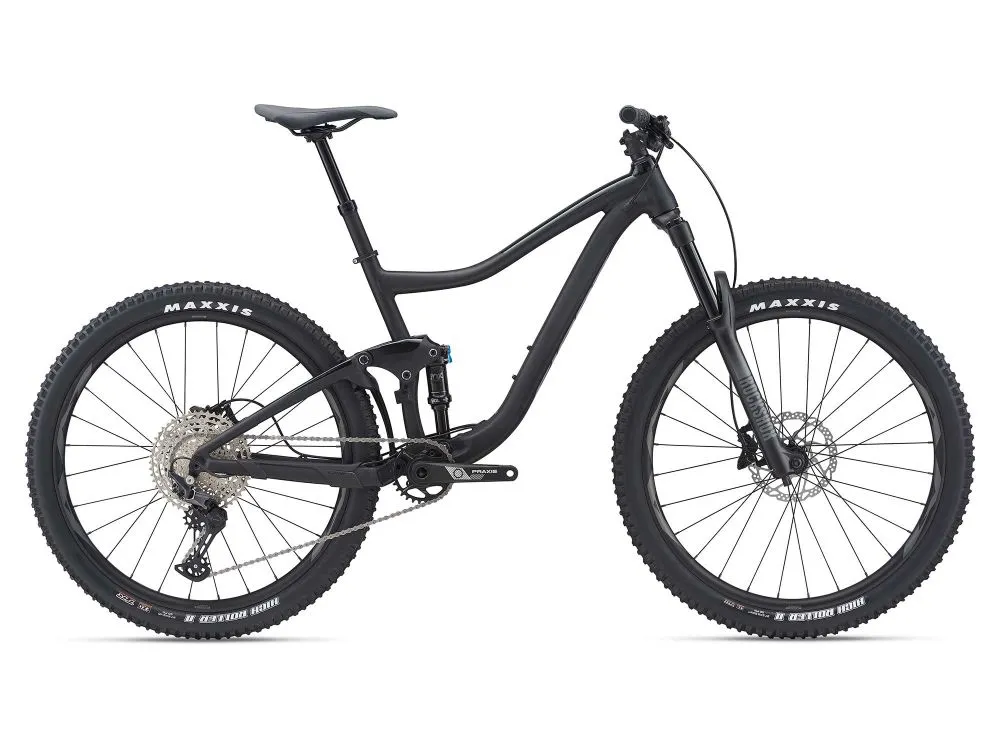
Pictured: The Giant Trance Bike.
- Bottom Bracket Type: Press-Fit BB92 (41mm inside diameter, 89.5 to 92mm wide).
- Hardware Required: Yes — 100mm Axle Motor Variant Mandatory.
- Support Interface: Official Toseven CNC High-Precision Reducer Support Bushings and 1mm/2mm Spacers.
7Giant Yukon (Fat Bike)
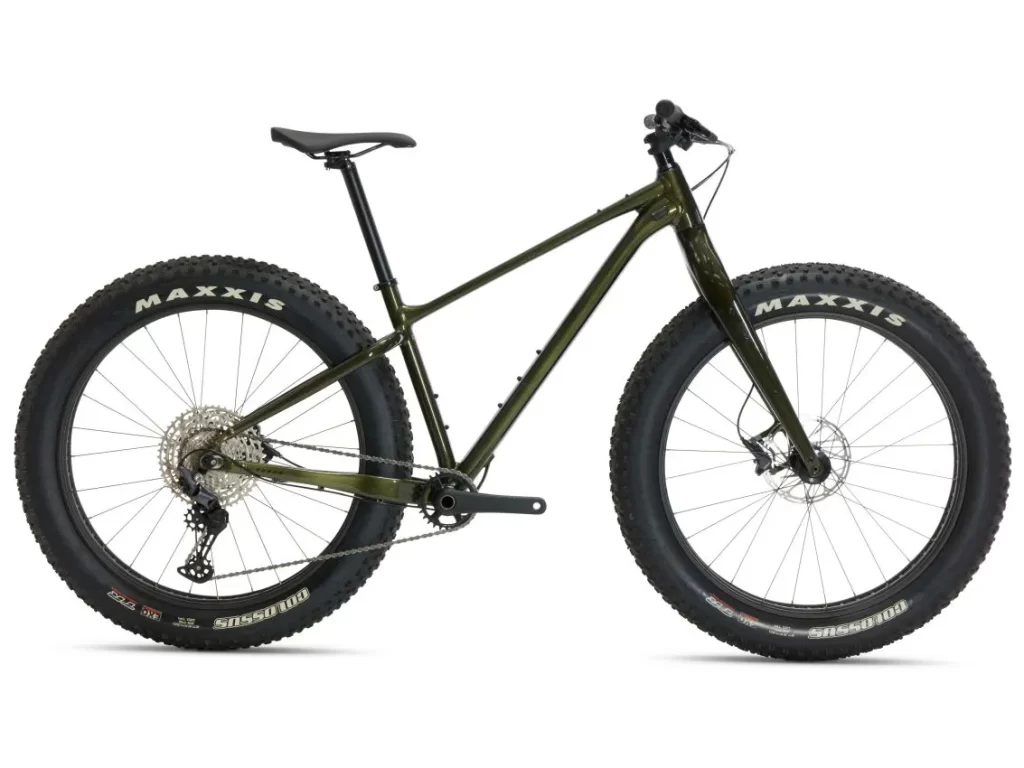
Pictured: The Giant Yukon Fat Bike.
- Bottom Bracket Type: Extra-wide Press-Fit (often 100mm or 120mm BB121 width).
- Adapter Required: Yes.
- Rear Spacing: 197mm Thru-Axle (197mm TA on newer/higher-spec Yukons; confirm whether your model uses QR or TA.
- Installation Difficulty: Advanced.
8Giant Defy and Giant Contend SL Disc Only (Road / Endurance)
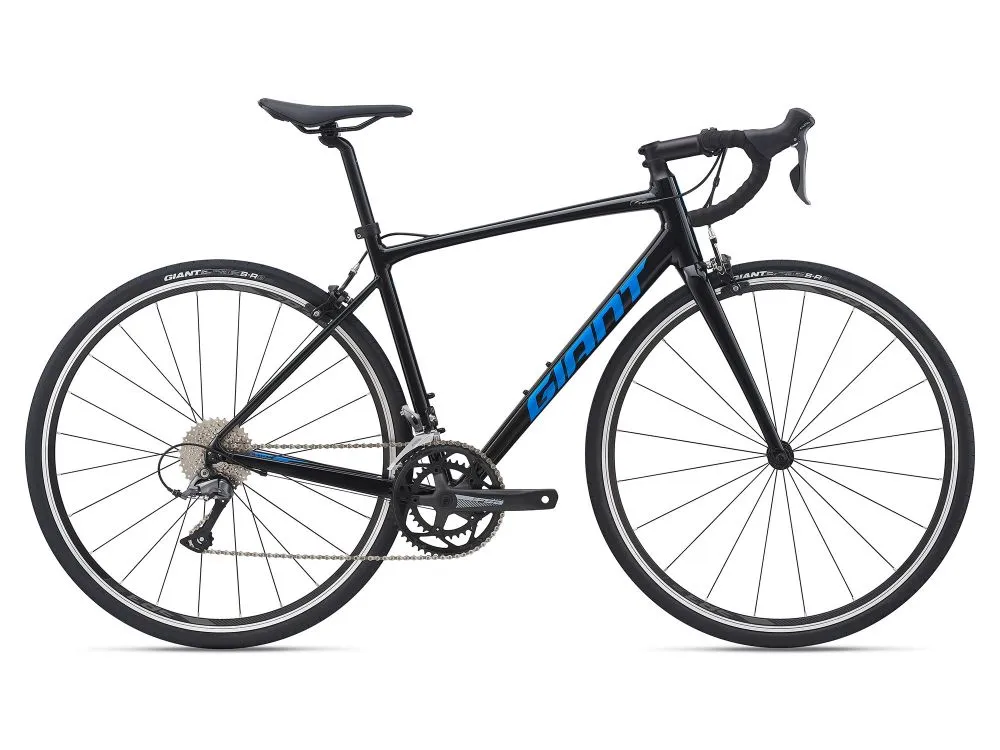
Pictured: The Giant Contend Bike.
- Bottom Bracket Type: Press-Fit BB86 (41mm inside diameter, 86.5mm wide).
- Support Interface: Official Toseven CNC High-Precision Reducer Support Bushings and 1mm/2mm Spacers.
- Rear Spacing: Non-Boost (Road spacing, usually 130mm or 142mm(if using a 2017+ Defy model)).
- Installation Difficulty: Advanced.
9Giant TCR & Giant Propel (Performance Road – Carbon Focus)
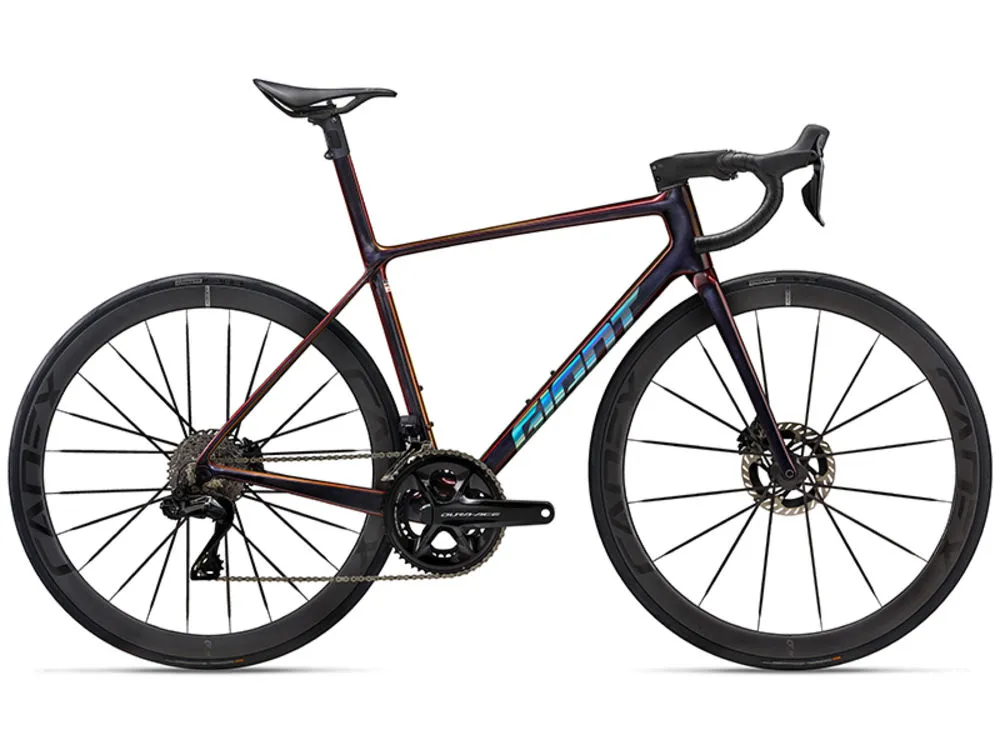
Pictured: The Giant TCR-Advanced Bike.
Engineer’s Note: Precision is non-negotiable for carbon road frames. Use the 1mm or 2mm spacers to achieve a perfect center-set motor position. This prevents chainline bias and ensures that the clamping force is distributed exactly where the shell is structurally reinforced.
Engineering Protocol For Composite Frames:
- DM01 Prohibition: Installation of the high-torque DM01 (160Nm) is strictly prohibited on Advanced Composite frames. The extreme localized clamping forces and torque transfer present a severe crushing risk to carbon shells.
- The DM02 Solution: Conversions on carbon frames are only achievable using the lightweight DM02 motor.
- Installation Specs: Adapters must be torqued strictly to 35 – 40Nm. You must use protective surface pads to increase the contact area and prevent localized stress.
Professional Requirement: This conversion requires an experienced technician to verify the structural integrity of the bonded frame junctions before and after installation.

02 Bottom Bracket Deep Dive
The Difference Between Threaded BSA, Press-Fit, and Wide Shells
Bicycle frames generally use one of these bottom bracket designs: 1. Threaded BSA (The Classic Standard)Found on the Giant Talon, Escape, Roam, ATX, Cypress, and Sedona, the BSA (British Standard Cycle) bottom bracket is the traditional, industry-standard design.- How it works: The inside of the bicycle frame’s shell has physical screw threads machined into the metal.
- The Measurements: The shell is typically 68mm to 73mm wide, and the smooth inside opening is roughly 33.6mm to 34.8mm in diameter.
- The Analogy: Think of this like a standard steel nut and bolt. The frame is the nut, and the bottom bracket parts screw securely into it.
- How it works: There are absolutely no screw threads inside the frame. Instead, the frame is simply a smooth, bare metal or carbon fiber tube. The bearings are forced (pressed) into the frame using high pressure.
- The Measurements: Press-fit shells are wider and have a larger opening. The inside diameter is always exactly 41mm. “BB86” means the shell is 86.5mm wide (for road bikes), and “BB92” means the shell is 89.5mm to 92mm wide (for mountain bikes).
- The Analogy: Think of this like pushing a tight cork into a wine bottle. It relies entirely on friction to stay in place, rather than screw threads.
- How it works: Similar to standard Press-Fit, but built significantly wider to accommodate massive fat bike tires.
- The Measurements: 41mm inside diameter, but 121mm wide.
- Engineering Note: Standard 68/73mm Toseven motors will Not Fit these wide shells. You must order a wide-shell specific Toseven motor variant. Chainline and spindle length must be calculated differently for fat bikes. Installation difficulty is advanced, and compatibility is only achieved with the correct motor width variant. (Confirm with the Toseven factory if uncertain.)
Why Toseven Motors Are Designed for Threaded BSA
Toseven mid-drive motors (both the heavy-duty DM01 and the lighter DM02) are natively engineered to fit perfectly into Threaded BSA frames. The main shaft of the Toseven motor is a solid cylinder of steel measuring 33.5mm in diameter. This dimension is intentional: it allows the motor to slide effortlessly through the 34.8mm threaded hole of a Giant Talon or Escape. Once the motor slides through, large steel locking nuts are threaded onto the motor shaft on the opposite side, clamping the motor tightly against the outside faces of the bicycle frame. Because the motor clamps securely against the flat outer edges of a 68mm or 73mm threaded shell, the installation is rock-solid and incredibly strong.Adapting Press-Fit Frames (BB86 and BB92) for Toseven Motors
If you own a Giant Fathom, you might be thinking: “My frame’s hole is 41mm wide, but the motor shaft is only 33.5mm. Won’t it just flop around inside?” Yes, it will. You absolutely cannot install a Toseven motor directly into a BB86 or BB92 frame without bridging the gap. To solve this, you must use the official Toseven CNC High-Precision Reducer Support Bushings supplied directly by the Toseven factory or authorized distributor. These precision-machined components are engineered to convert the 41mm frame opening to the 33.5mm motor spindle while distributing the 160Nm of torque evenly across the frame wall. Toseven provides compatible solutions for Press-Fit frames. Always source adapters and spare parts directly from the Toseven factory. Factory-supplied components ensure correct machining tolerances. Using incompatible or low-precision adapters may result in improper fitment.✅ Factory Support Notice
You do not need to search for or purchase these components separately. We (the Toseven motor factory) will provide the necessary official CNC High-Precision Reducer Support Bushings and a 1mm/2mm Precision Spacer Kit with your order to ensure a 100% precision fit for your specific Giant frame.How the Official Adapter Works:
- The Drive Cup: A precision-machined aluminum cup is coated in grease and pressed tightly into the right side of your 41mm frame.

- The Motor: The Toseven motor slides through this new cup.
- The Screw-On Cup: A second cup slides over the left side and physically screws onto the motor, effectively sandwiching your threadless frame between two solid pieces of aluminum.
The Engineering Warning: Torque Stress and Machining Tolerances
When you accelerate up a steep hill, a Toseven DM01 generates up to 160 Newton-meters (Nm) of torque. This is an immense amount of twisting force. The motor physically wants to pivot backward around your bottom bracket. In a threaded BSA frame, the locking nuts easily resist this twist. However, in a smooth, threadless Press-Fit frame, this twisting force must be managed perfectly. This is why the official two-piece thread-together adapter is mandatory. When you tighten the official adapter down, it permanently locks the adapter and the motor in place, meaning the 160Nm twisting force is safely transferred to the aluminum frame without any slipping. Proper shell alignment and utilizing the factory-supplied adapter are the secrets to a quiet, powerful, and indestructible e-bike.The Engineering Warning: Carbon Fiber Shells (TCR / Propel / Revolt Advanced)
While aluminum frames like the Giant Fathom handle this torque brilliantly, you must exercise extreme caution with carbon fiber. High-torque motors like the DM01 are generally Not recommended for carbon frames. Carbon shells (like the BB86 found on the TCR and Propel) are engineered using directional layups designed to resist human pedaling forces, not the external, localized clamping pressure of a metal motor unit. The clamping force required to secure the motor and press-fit adapters can easily crush the carbon shell. Furthermore, press-fit adapters transfer torque differently in carbon versus aluminum, and excessive torque heavily stresses bonded frame junctions.⚠️ Recommendation
Use the DM02 or a lower power configuration for carbon, and verify the structural condition carefully. (Confirm with the Toseven factory if uncertain.)03 Chainline & Chainring Offset
What is Chainline Geometry and Why Does it Matter?
Chainline refers to the imaginary, straight line that runs from your front gear (known as the chainring) to your rear gears (known as the cassette). On a perfect, factory-built bicycle, if you shift your chain into the exact middle gear in the back, the chain will form a perfectly straight line from front to back. A proper chainline ensures smooth, efficient shifting across all of your gears, minimizing noise and preventing the metal components from wearing down prematurely.The Mid-Drive Problem
When we install a Toseven DM01 or DM02 motor into your Giant’s bottom bracket, we are adding a physically wide piece of machinery between the frame and the pedals. Because the motor takes up space, it naturally pushes your new front chainring further outward—away from the bicycle frame. If we leave it like this, your front gear is now sitting too far to the right. When you try to shift into your lowest gears (the largest cogs in the back that you use for climbing steep hills), the chain has to stretch at a severe diagonal angle to reach them. This extreme angle is called “cross-chaining.” The Consequences of Incorrect Alignment: If you ignore chainline geometry, you will experience highly frustrating mechanical issues:- Dropped Chains: The severe diagonal angle will pull the chain completely off the front gear while you are riding.
- Poor Shifting: Your rear derailleur will struggle to push the chain up into the climbing gears, resulting in skipping or hesitation.
- Accelerated Wear: The extreme tension and friction will stretch your chain and cause premature wear to the cassette teeth and chain integrity.
The Engineering Solution: 0mm vs 9mm Offset Chainrings
To solve the problem of the motor pushing the gear too far outward, Toseven manufactures two different types of chainrings for their motors: 0mm offset and 9mm offset.- 0mm Offset Chainring: This gear is completely flat. Where it mounts to the motor is exactly where the gear teeth sit.
- 9mm Offset Chainring: This gear is shaped like a shallow bowl. It curves inward over the motor casing, physically relocating the gear teeth 9 millimeters closer to the bicycle frame.
Matching Offset to Your Giant Frame
⚠️ Important: Motor Casing Thickness (DM01 vs. DM02)
The DM01 motor body is significantly thicker than the DM02. While a 9mm offset is ideal for the chainline, it often causes the gear teeth to strike the chainstay (the rear frame arm) on a Giant Talon or Roam when paired with a DM01 motor. The Test: Always test with a 0mm or 3mm offset first. Only upgrade to 9mm if there is a clear physical gap between the gear and the frame. Compact Warning: For compact city frames like the Giant Escape, a 9mm offset will result in frame contact nearly 100% of the time; use 0mm or 3mm to protect your aluminum finish.1Non-Boost Frames (135mm or 142mm wide)
Older mountain bikes, as well as the Giant Escape (city), Giant Roam (hybrid), Giant ATX, and Giant Talon (XC mountain), utilize standard, narrower rear wheels. Because the rear gears sit closer to the center of the bike, the front gear also needs to sit closer to the center.- The Rule: When converting a Giant Talon or similar model, the 9mm offset chainring is highly recommended. The deep inward curve is necessary to align the front gear with the narrow rear cassette, ensuring you can use your easiest climbing gears without the chain dropping. Note: On very tight road or fitness frames like the Escape, you must visually check that the 9mm inward curve doesn’t cause the metal gear teeth to scrape against the frame’s chainstay. If it rubs, you must fall back to a 0mm offset, though 9mm is the ideal goal for shifting performance.
2Boost Frames (148mm wide)
Modern, progressive mountain bikes like the Giant Fathom and full-suspension Giant Trance use “Boost” spacing. Boost means the rear wheel is physically wider, which naturally pushes the rear gears further outward.- The Rule: Because the rear gears are sitting further outward, you have a bit more forgiveness. However, the 9mm offset chainring is still the superior choice here to achieve that optimal 52mm to 55mm chainline required by Boost frames. It brings the front gear into perfect alignment with the center of the rear cassette, granting you flawless access to the massive rear gears needed for trail climbing.
3Gravel & Variable Geometry (Giant Revolt Flip-Chip)
The Giant Revolt utilizes a 142mm rear thru-axle, but it features a unique “Flip-Chip” rear dropout that allows you to change the bike’s wheelbase.- The Rule: For a Toseven installation on a compatible aluminum Revolt, setting the Flip-Chip to the “Long” position (+10mm wheelbase) is mandatory. This adjustment increases high-speed stability and improves chainline tension and clearance for the motor, allowing the drivetrain to manage the torque output efficiently.
4Fat Bike Extra-Wide Spacing (Giant Yukon – 197mm wide)
The Giant Yukon features a massive 197mm rear hub spacing to accommodate fat tires, which pushes the rear cassette exceptionally far outward.- The Rule: A standard 68/73mm Toseven motor will not achieve a proper chainline here, regardless of the chainring used. You must order the wide-shell specific Toseven motor variant (designed for 100mm/120mm shells). Because the spindle length is calculated differently on these wide variants, it naturally pushes the front gear outward to perfectly align with the 197mm rear cassette. Compatibility is only achieved with the correct motor width variant. (Confirm with the Toseven factory if uncertain.)
04 Installation Engineering Guide

1. The Required Tools List
To safely remove your old bicycle components and install the new electric mid-drive, you need a few specific tools. Do not attempt this with adjustable pliers or hammers, as you will damage your frame.- Metric Hex Keys (Allen Wrenches): You will use 6mm and 8mm hex keys extensively. The 8mm is required for your pedal crank arms.
- Crank Puller: If your Giant bicycle has a standard square-taper bottom bracket (common on older models), you need an M8 crank puller to physically push the tight metal crank arms off the spindle.
- Bottom Bracket Tool: To remove your old bottom bracket, you need a 20-spline BB tool (for threaded frames) or a bearing drift/press (if you are removing press-fit bearings from a Giant Fathom or TCR).
- Toseven Special Wrench: This is a proprietary, 16-notch wrench included in the Toseven conversion kit. You will use this to tighten the large motor locknuts.
- Torque Wrench: A mechanical wrench that clicks when you reach a specific tightness. This is absolutely critical for safety.
2. Motor Housing Rotation Positioning
Once your bottom bracket shell is completely empty and clean, slide the Toseven motor axle through the frame’s bottom bracket hole from the right side (the drive side). The motor is heavy and will naturally want to hang straight down toward the ground. You cannot leave it there. You must physically grab the motor casing and rotate it clockwise (upward) until the motor body sits as close to your Giant’s down tube as possible, stopping when it makes firm contact with the frame.✅ Engineer’s Trick (Frame Protection)
Giant ALUXX aluminum frames use thin-walled butted tubing to reduce weight. Adding a thin rubber interface layer between the motor casing and the bicycle frame can improve vibration damping, improve surface contact, and protect the paint finish.⚠️ Engineering Warning For Composite Frames
Do Not Clamp The Motor Mounting Plate Or Motor Housing Directly Against Carbon Fiber Down Tubes (e.g., Giant TCR, Propel, Revolt Advanced). The localized clamping force and 160Nm torque transfer can easily crush the composite layup.3. Navigating Giant Internal Cable Routing
Modern Giant bicycles feature internal cable routing, meaning your derailleur and brake cables run invisibly inside the frame and exit through integrated ports near the bottom bracket.⚠️ Routing Precaution
When rotating the motor into position, ensure that frame cables (shift, brake, and sensor lines) are positioned to avoid compression. Use a thin rubber interface layer if needed to guide contact. (Confirm with the Toseven factory if uncertain.)4. Avoiding Interference with Giant Maestro Suspension
Note: If you are converting a hardtail like the Giant Fathom or a standard city bike, you can skip this step. This is strictly for full-suspension mountain bikes. If you are converting a Giant Trance or Giant Stance, your bike uses Giant’s proprietary “Maestro” suspension system. This system utilizes a complex metal linkage that pivots right behind the bottom bracket. The Golden Rule of Full-Suspension Conversions: You must check clearance at full compression. To do this safely:- Let all the air pressure out of your rear suspension shock.
- Push down hard on the saddle until the suspension bottoms out completely.
- Look closely at the gap between the motor and the Maestro linkage. If they touch, you must loosen the motor and rotate it further down, away from the down tube, until the linkage clears the motor through its entire arc of travel.
5. The “Frame Triangle” Battery Clearance Check
Giant frames, especially full-suspension models like the Trance or Stance, have very limited space inside the main front triangle.- The Caution: Before purchasing a battery, you should create a cardboard cutout of the battery’s exact physical dimensions to ensure it clears the rear shock and the motor casing.
- Why it Matters: This prevents the common mistake of buying a high-capacity battery that physically will not fit into your specific Giant frame size.
Step-by-Step Mechanical Installation Blueprint
Here is the exact, step-by-step mechanical blueprint to install the DM01 or DM02 mid-drive unit onto your Giant frame.Phase 1: Motor Insertion And Orientation
- Insert the Motor: After removing your original bottom bracket, carefully guide the Toseven motor axle through the bottom bracket shell from the right side (the drive side) of your Giant frame.
- Note: If you are converting a modern Giant Fathom (BB92), Yukon (BB121), or TCR (BB86), remember that this step must be preceded by pressing the official Toseven CNC High-Precision Reducer Support Bushings into your threadless shell to provide the required mounting surface.
- Rotate and Brace: The heavy motor will naturally hang downward. You must physically rotate the motor body clockwise (upward) until it makes firm contact with the bicycle’s down tube and stops.
- Protect the Frame (Giant-Specific): Giant ALUXX frames use thin-walled aluminum to reduce weight. Adding a 1-2mm thick rubber interface layer between the motor and the frame at the contact point can improve vibration damping, improve surface contact, and protect the paint finish.
⚠️ Critical Step: Spacers for Precision Clamping (See the photo below)
The Step: Once the motor axle is through the bushings and rotated into position, inspect the length of the exposed threads on the non-drive side. The Action: Slide the provided 1mm or 2mm spacers (Spacers) onto the axle before installing the reinforcement plate and locknut. The Purpose: These spacers ensure the locknut has enough “bite” to apply maximum clamping force without bottoming out on the axle threads. Factory Note: Toseven includes two standard spacers with every motor kit. If your specific Giant frame geometry requires a unique offset, please contact the factory to customize your spacer requirements.
Phase 2: The Chainring Assembly
- Align the Splines: Take the 42T (for DM02) or 46T (for DM01) chainring (These are factory-included defaults – your ideal chainring size depends on your cassette range and terrain) and align its internal splines perfectly with the external splines on the motor. Press it firmly until it seats completely against the housing.
- Torque the Locknut: Thread the M42 chainring locknut onto the assembly. Using the Toseven special 16-notch wrench, tighten this nut counterclockwise (This is a left-hand (reverse) thread – tighten counterclockwise) to exactly 15 Nm.
Phase 3: Securing The Motor (Critical Torque Specs)
- Install the Reinforcement Plate: On the left (non-drive) side, slide the metal reinforcement plate over the axle. If your Giant frame has a 73mm bottom bracket (like the Talon or Stance), you must install the specific Φ6X5 washers between the plate and the motor to bridge the gap.
- Torque the Plate Bolts: Using a 6mm Allen wrench, tighten the M6 screws holding the plate to 9-10 Nm.
- Tighten the Main Locknut: Thread the large, non-standard mounting nut onto the motor shaft. Verify the motor is still positioned correctly against the down tube, then use the Toseven special wrench to torque this nut to 45-50 Nm. This requires significant physical force and permanently locks the system to the frame.
Phase 4: Crank Arms And Peripherals
- Attach the Cranks: Slide the left and right 170mm crank arms onto the axle (170mm is the factory-included default, riders on size Small frames may prefer 165mm).
- Torque the Axle Screws: Using an 8mm Allen wrench, tighten the central axle bolts to 35-40 Nm. Engineer’s Warning: Failure to reach this specific torque will cause the crank arms to loosen under pedal pressure and permanently ruin the mounting interface.
- Install the Decoration Cap: If your kit includes the side decoration cap, thread it clockwise by hand until snug.
Phase 5: Electronic Sensor Calibration
- Speed Sensor Mounting: Secure the speed sensor to the non-drive side rear chainstay using two cable ties.
- Magnet Alignment: Mount the magnet to a rear wheel spoke using a flat-blade screwdriver. Ensure the flat, magnetic surface aligns directly with the circular mark on the sensor receiver.
- Set the Tolerance Gap: If using the SVS1 sensor model, use a Phillips screwdriver to loosen the mount and adjust the receiver so the gap between the magnet and the sensor is strictly 2mm to 10mm. If using the SVS2 model, the gap must simply remain under 15mm.
Phase 6: Cable Routing Engineering
- When connecting the EB-Bus cable, battery, and speed sensor, ensure that frame cables (shift, brake, and sensor lines) are positioned to avoid compression. (Confirm with the Toseven factory if uncertain.) Route all cables externally around the motor block, securing them cleanly with the provided split cable wraps.
Phase 7: Mandatory Shift Sensor Integration
- The Component: The shift sensor is a mandatory integrated component of all Toseven DM01 kits (The DM02 kit does not include a shift sensor and does not require one). It is included by default in the factory kit and must always be installed and connected.
- The Engineering Logic: The DM01 produces up to 160Nm of torque. High-torque systems require coordinated drivetrain management. The shift sensor ensures smooth, controlled gear transitions by automatically cutting motor power momentarily during gear changes.
- Drivetrain Protection: Utilizing this sensor protects derailleur alignment, prevents premature wear to the cassette teeth, maintains chain integrity, and protects the freehub engagement system. Operating a high-torque mid-drive without shift detection is mechanically unsafe; therefore, this installation step is not optional.
05 Programming & Torque Calibration
Understanding Your T24 Display
The T24 display is the digital command center mounted on your handlebars. It is a full-color, waterproof screen that shows you all your essential ride data, such as speed, battery life, and power output. Out of the box, the T24 display gives you three main Power Modes to choose from, which limit the maximum power the motor will draw from the battery:- Eco: Best for maximizing your battery range and getting more exercise.
- City: A balanced mode for everyday riding and commuting.
- Sport: Unlocks the maximum power for steep hill climbs and fast acceleration.
Setting the Wheel Size
One of the first things you need to do in the basic settings menu is input your bicycle’s wheel size. Because the speed sensor relies on the wheel spinning to calculate your speed, telling the computer the correct wheel size ensures your speedometer and odometer are completely accurate. Giant bicycles use a variety of wheel sizes depending on the model:- If you are riding a modern mountain bike like the Giant Fathom 29 or Talon 29, you will set the wheel size to 29 inches.
- If you are riding a fitness or hybrid bike like the Giant Escape or Giant Roam, these typically use 700c wheels.
- Older or smaller mountain bikes may use 26-inch or 27.5-inch wheels. Check the sidewall of your rubber tire if you are unsure of your size.
The Magic of the Torque Sensor
Most basic e-bike kits use a standard “cadence sensor,” which acts like an on/off switch: the moment you start spinning the pedals, the motor kicks in at a fixed speed. The Toseven DM01 and DM02 motors are vastly superior because they feature a built-in torque sensor alongside the cadence sensor. A torque sensor physically measures how hard you are pushing down on the pedals.- If you are pedaling lightly on a flat road, the motor gives you a gentle push.
- If you stand up and stomp on the pedals to climb a steep hill, the motor instantly recognizes your effort and delivers a massive surge of power to help you up.
The Golden Rule of Torque Calibration
The torque sensor performs an initial baseline calibration during startup. For optimal accuracy, keep your feet off the pedals while powering on. This ensures the system reads true zero-load conditions. This is considered a best practice for accurate torque sensing and guarantees your motor will deliver peak performance and intuitive power proportionality exactly as engineered. To ensure proper baseline calibration:Stop the bicycle completely
Ensure the bicycle has completely stopped.Feet off the pedals
Keep both of your feet completely off the pedals.Power on the T24 display
Press the power button to turn on the T24 display.Wait for full load
Wait for the screen to fully load before you step onto the pedals and begin riding.⚠️ The 3-Second Window
After pressing the power button on the T24 display, it is strictly forbidden to touch the pedals for at least 3 seconds. The system requires this window to calibrate the ‘zero-load’ baseline accurately. Internal Routing Precaution: If your Giant’s internal gear or brake cables exit the frame close to the bottom bracket, the physical tension of the cables can interfere with the torque sensor. The Solution: Install protective conduits on the cables where they pass the motor mount. This shields the sensor from cable tension and prevents ‘zero-point drift,’ ensuring your pedal assist stays consistent and powerful.Advanced Settings and Ride Feel Tuning
One of the best features of the Toseven system is that you can adjust almost every motor parameter directly from the T24 display without needing special programming cables. Inside the advanced settings, you can adjust the sensitivity of the torque sensor. Depending on your riding style, you may prefer a more gradual power delivery from a dead stop rather than an instant surge. If so, try changing the torque sensor setting from “Sensitive” to “Safe” mode, which provides a smoother, more predictable ramp-up of power.06 Faq / Troubleshooting
1Let’s talk about Toseven DM01 Giant Talon compatibility. Is this an easy project?
Yes, absolutely. The Giant Talon (as well as the ATX, Escape, and Roam) is widely considered one of the best foundation bikes for an electric conversion. Because the Talon frame uses a traditional, threaded BSA bottom bracket (typically 68mm to 73mm wide), the Toseven motor shaft will slide straight into the frame natively. When you convert Giant Talon to e-bike mid drive power, you are pairing a structurally strong aluminum frame with a seamless mechanical fit. It is a highly recommended, beginner-friendly build.2What if my bike does not have screw threads? How does a Giant Fathom or Revolt installation work?
If you have a modern progressive trail bike like the Giant Fathom (BB92) or an aluminum gravel bike like the Giant Revolt, your frame uses a smooth, threadless “Press-Fit” bottom bracket shell. For a successful installation, you absolutely must use the official Toseven CNC High-Precision Reducer Support Bushings supplied directly by the Toseven factory or authorized distributor. These factory-supplied components ensure correct machining tolerances and provide the structural interface the motor needs to clamp down safely without noise or displacement.✅ Factory Support Notice
You do not need to search for or purchase these components separately. We (the Toseven motor factory) will provide the necessary official CNC High-Precision Reducer Support Bushings and a 1mm/2mm Precision Spacer Kit with your order to ensure a 100% precision fit for your specific Giant frame.
3Can I install the Toseven DM01 on a carbon fiber Giant TCR, Propel, or Revolt Advanced?
Engineering Verdict: Installation of the high-torque DM01 (160Nm) is strictly prohibited on Advanced Composite frames. Carbon fiber shells are engineered to resist human pedaling forces, not the extreme localized clamping pressure of a high-torque mid-drive unit, which can crush the shell and stress bonded frame junctions.- The DM02 Solution: Conversions on carbon frames are only achievable using the lightweight DM02 motor.
- Mandatory Specs: The mounting hardware must be torqued strictly to 35-40Nm, utilizing protective interface pads to increase the contact area and prevent localized stress.
- Professional Requirement: This conversion requires an experienced technician to verify the structural integrity of the frame before and after installation.
4I am converting an entry-level Giant ATX. Do I need to upgrade my brakes?
Yes. Since entry-level bikes like the ATX, Cypress, and Sedona were originally designed for lower, human-powered speeds, users converting to a 1000W DM01 system must verify their brakes are in peak condition. For Giant bikes with rim brakes or mechanical discs, a professional inspection or an upgrade to hydraulic disc brakes is a standard safety best practice for high-torque conversions.5Why is the shift sensor a mandatory component?
The shift sensor is a mandatory integrated component of all Toseven DM01 kits (The DM02 kit does not include a shift sensor and does not require one). It is included by default in the factory kit and must always be installed and connected. The DM01 produces up to 160Nm of torque. High-torque systems require coordinated drivetrain management. The shift sensor ensures smooth, controlled gear transitions by automatically cutting motor power momentarily during gear changes. This intelligent system protects derailleur alignment, prevents premature wear to the cassette teeth, maintains chain integrity, and protects the freehub engagement system. Operating a high-torque mid-drive without shift detection is mechanically unsafe; therefore, this is not optional.6What if I have a fat bike like the Giant Yukon? Will the standard motor fit?
No, the standard 68/73mm Toseven motors will Not Fit the extra-wide shells of fat bikes. The Giant Yukon utilizes a massive BB121 (121mm) press-fit shell. You must order a wide-shell specific Toseven motor variant designed specifically for 120mm applications, along with the official Toseven CNC High-Precision Reducer Support Bushings and Snow-Bike High-Offset Chainring. A standard 100mm axle is completely incompatible with the Yukon’s BB121 shell. Chainline and spindle length must be calculated differently to accommodate the fat tires. Compatibility is only achieved with the correct motor width variant. (Confirm with the Toseven factory if uncertain.)7If my chain falls off while riding, can I just quickly put it back on?
⚠️ Warning: You must absolutely turn the e-bike Off via the display before your hands go anywhere near the front chainring.