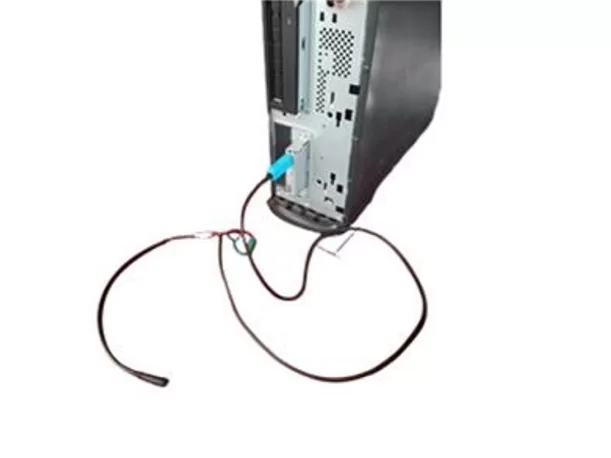
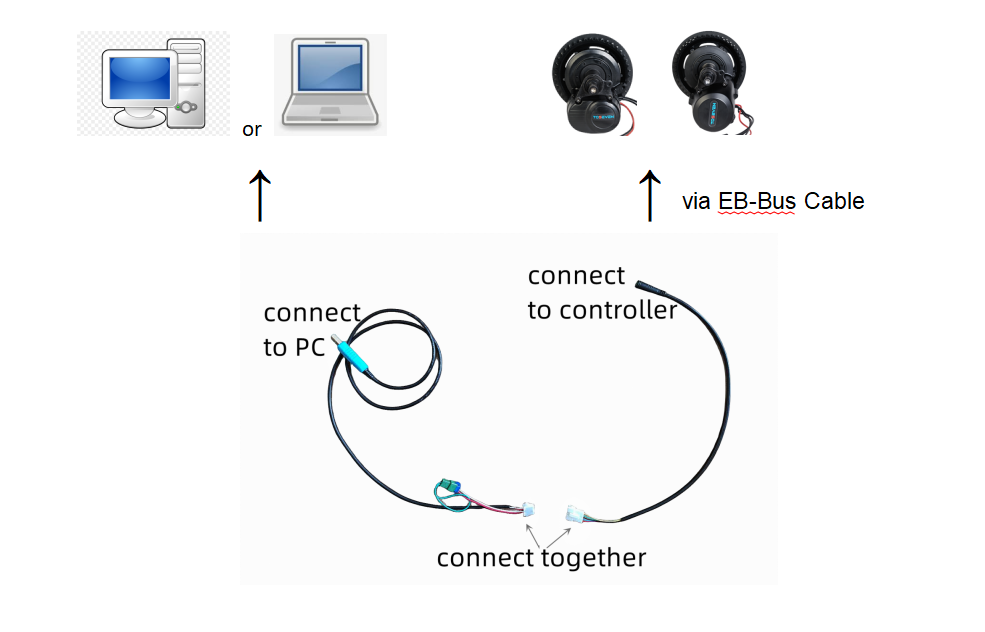
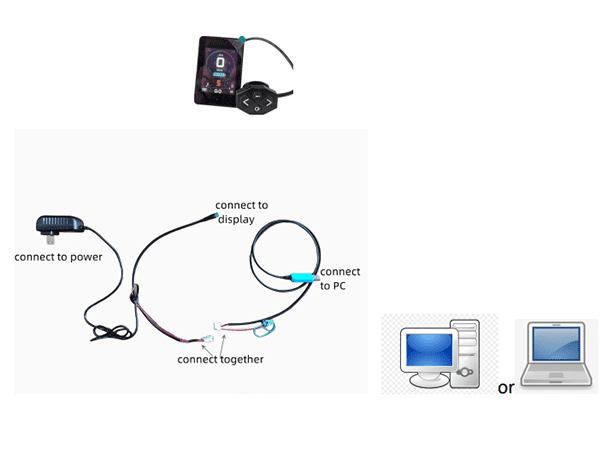
1.
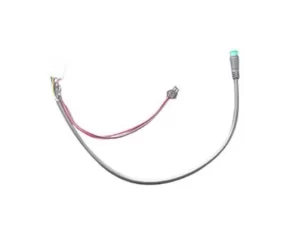
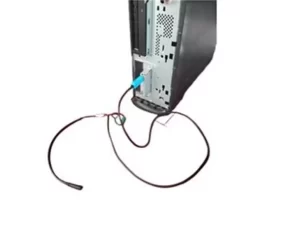
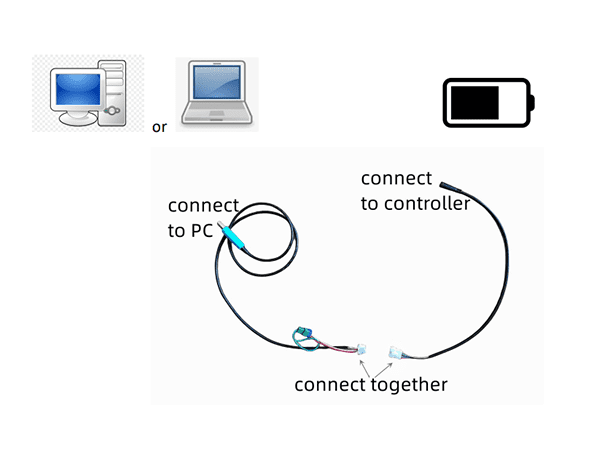
Before proceeding, please ensure that the mid-motor is connected to the e-bike
battery and the programmer is connected to the USB port on the computer host, as
shown in the image on the right.
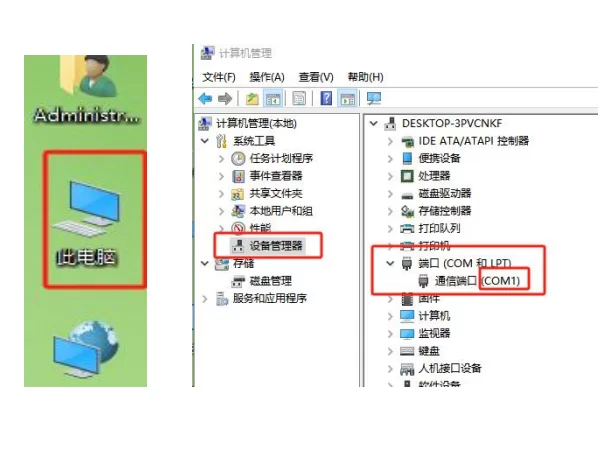
2.
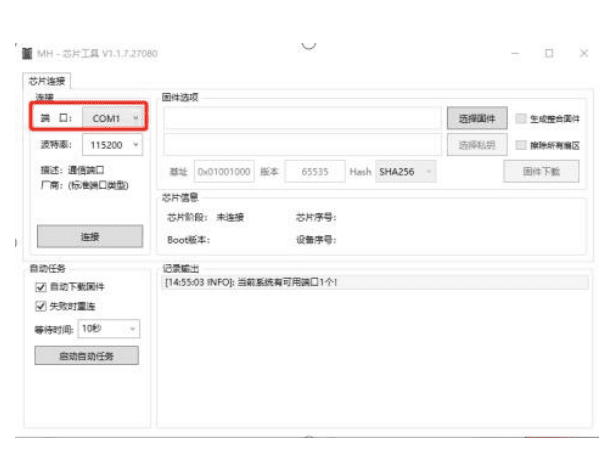
Go to "Device Manager" in the "Management" option of "My Computer" and confirm
which port (COM1, COM2, COM3...) of the computer the programmer is connected to.
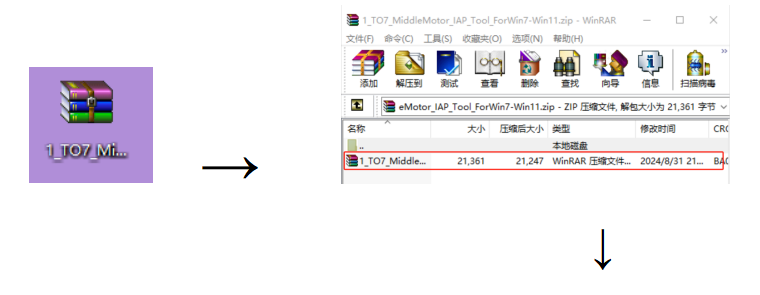
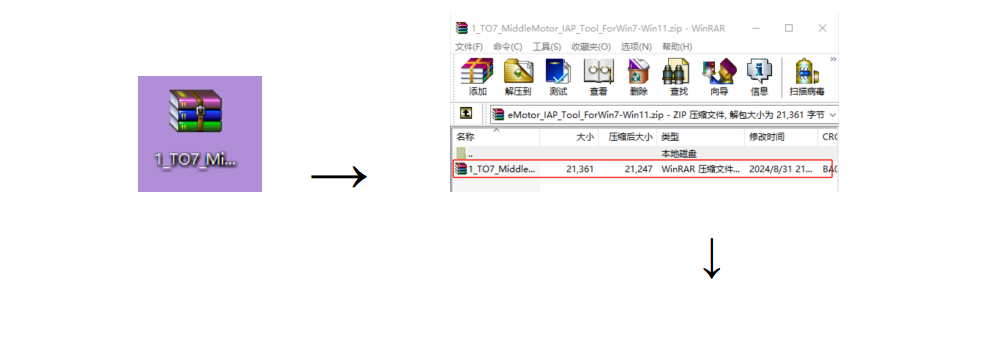
3.
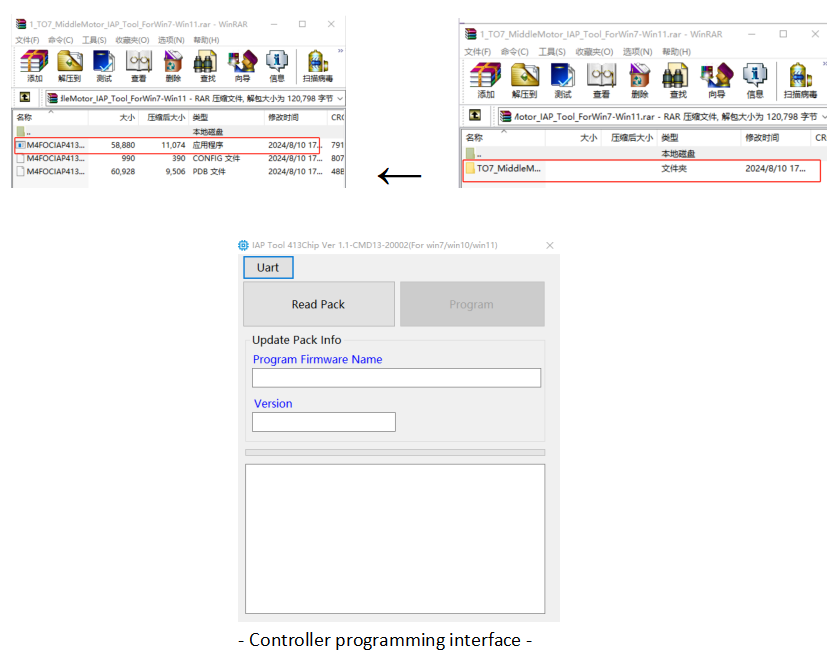
Please download the “IAP TOOL” zip file from the download page at “to7motor.com”.
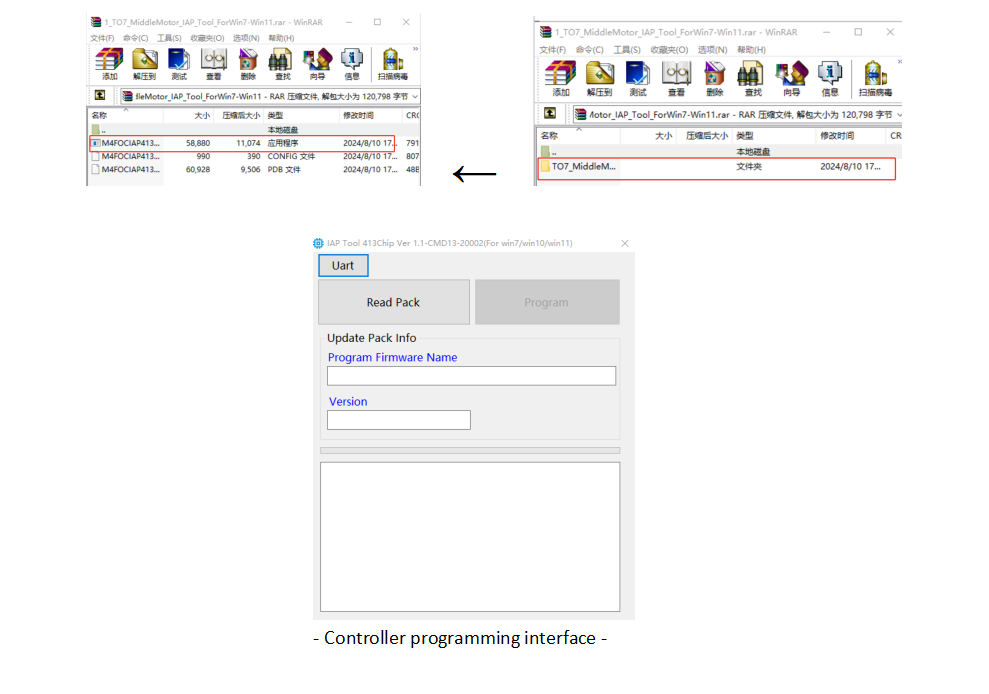
Once the download is complete, open the zip file and locate the application inside,double-click the software icon to enter the “controller programming interface”
4.
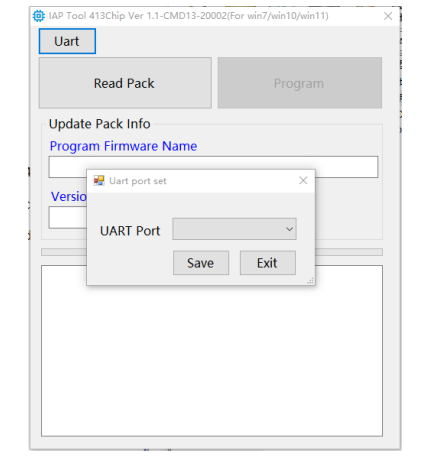
Once you enter the operation interface, click the 'UART' tab on the upper left corner to
configure the UART port. Ensure it matches the programmer's port in the computer
device manager (in step 2).
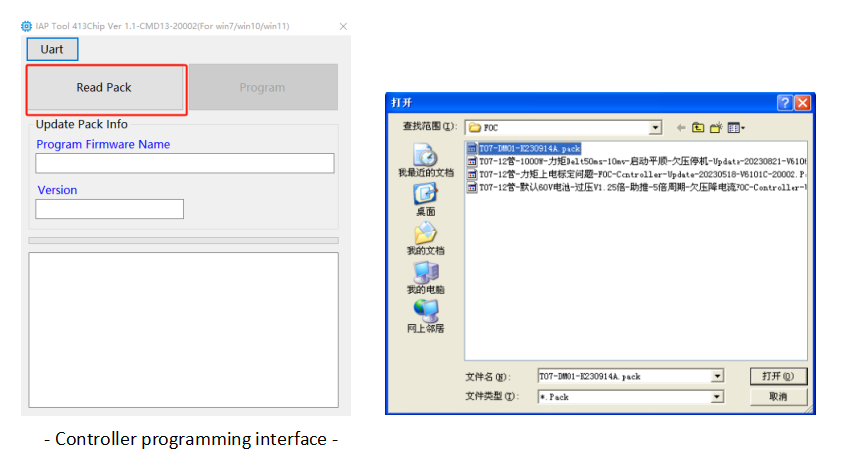
After configuring the port, return to the operation interface and click “Read Pack” on the controller programming
interface.
Once “Read Pack” is clicked, a new pop-up box will appear, as depicted in the image on the right.
5.
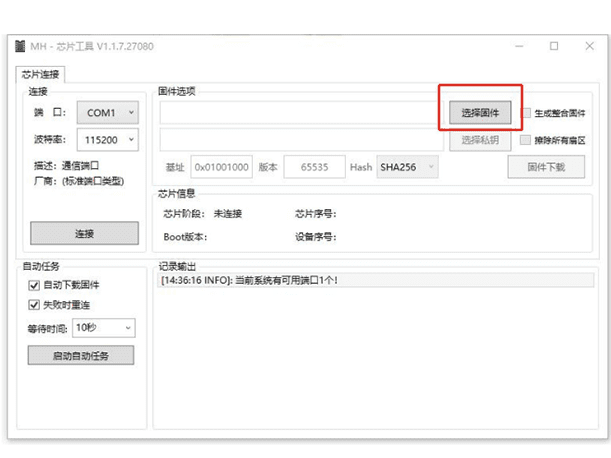
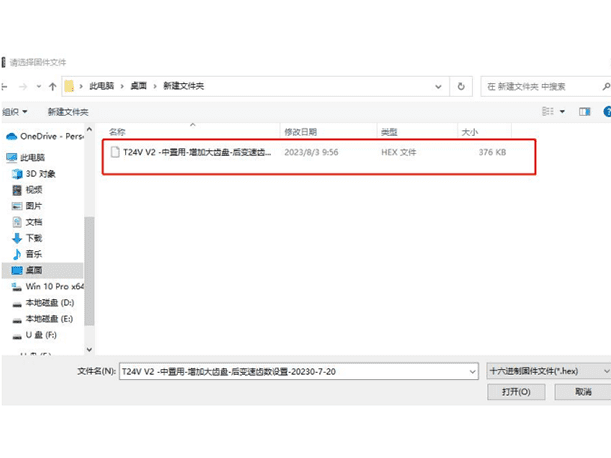
Select and open the “controller update program” file, the following screen on the right
side will be shown.
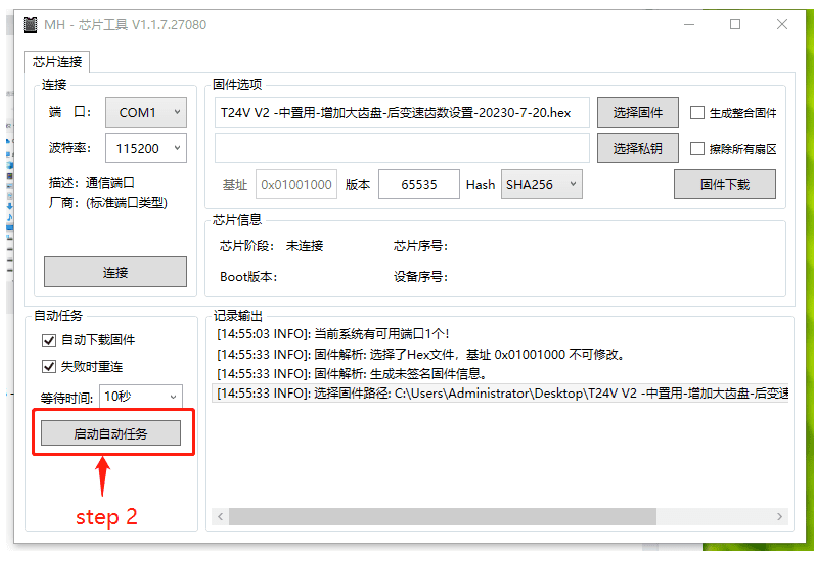
6.
Click the “Program” button on the controller programming interface to start
programming.
7.
As soon as the programming is complete, the controller programming interface will
display "Program successfully" as shown.